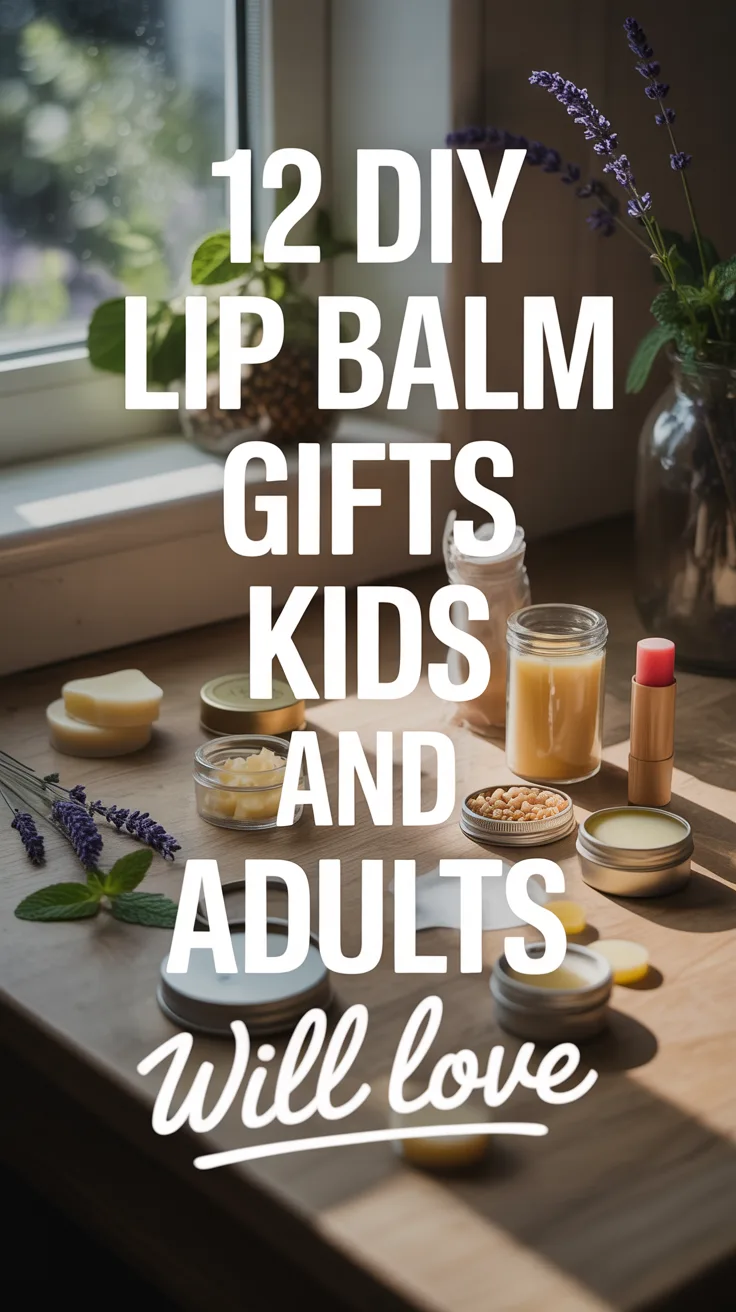
Introduction
There’s something incredibly special about handmade gifts, especially ones that are both practical and personalized. As someone who’s been crafting homemade presents for years, I’ve found that DIY lip balm gifts consistently delight both kids and adults alike. The first time I made lip balm as holiday presents, I was amazed by how such a simple project could generate so much joy—and how quickly they became the most requested gift from my friends and family. In this article, I’ll share everything you need to know to create beautiful, nourishing lip balm gifts that will impress everyone on your list.
Why DIY Lip Balm Makes a Great Gift
I still remember the look on my sister’s face when I gave her a set of custom lip balms in her favorite flavors. That’s when I realized just how perfect these little treasures are as gifts. DIY lip balm offers a unique combination of thoughtfulness and practicality that few other handmade gifts can match.
First, they’re genuinely useful—everyone needs moisturized lips, especially during harsh winter months. Unlike many gifts that collect dust, these will actually get used daily. Second, they’re completely customizable. You can tailor the scent, flavor, color, and even therapeutic properties to suit each recipient’s preferences and needs.
From an economic standpoint, they’re a winner too. With one set of basic ingredients, you can make dozens of lip balms, making them perfect for holiday gifting, party favors, or teacher appreciation gifts. I once made 30 lip balms for under $25—try finding quality store-bought gifts at that price!
Perhaps most importantly, there’s something deeply personal about giving someone a product they’ll apply to their lips that you made with your own hands. It communicates care in a way few other gifts can.
Pro Tip: For holiday gifting, I start making batches in October and store them in a cool, dark place. This spreads out the work and ensures I’m not rushing at the last minute.
Essential Ingredients for DIY Lip Balm
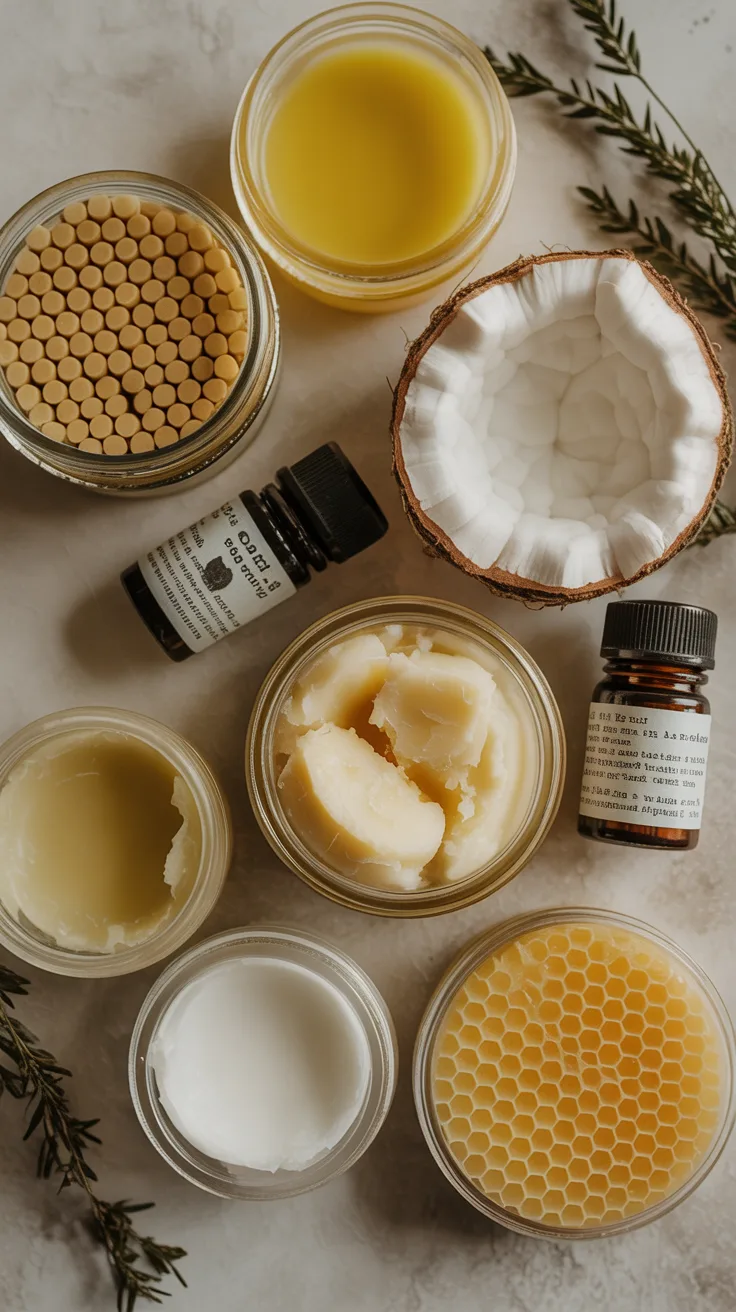
When I first started making lip balm, I was overwhelmed by ingredient options. After much experimentation (including some spectacular failures), I’ve narrowed down the essentials that consistently produce great results:
- Beeswax – Provides structure and creates a protective barrier on lips. I prefer pellets over blocks as they melt more easily.
- Carrier Oils – Coconut oil, sweet almond oil, or jojoba oil form the moisturizing base. Coconut oil creates a smoother texture, while jojoba most closely mimics our skin’s natural oils.
- Butters – Shea butter or cocoa butter add richness and deep hydration. Shea is less fragrant if you’re adding your own scents.
- Essential Oils – For fragrance and potential therapeutic benefits. My favorites are peppermint (cooling), lavender (calming), and sweet orange (uplifting).
- Vitamin E Oil – Acts as a natural preservative and adds extra nourishment. I learned the hard way that skipping this can lead to rancid balms!
- Natural Sweeteners (optional) – Honey, stevia, or vanilla extract can add a pleasant taste.
- Natural Colorants (optional) – Beetroot powder, cocoa powder, or cosmetic-grade mica for a touch of color.
Pro Tip: Always use cosmetic-grade ingredients. The first time I made lip balm, I used regular cooking oils and they went rancid quickly. Lesson learned!
Tools You Need to Get Started
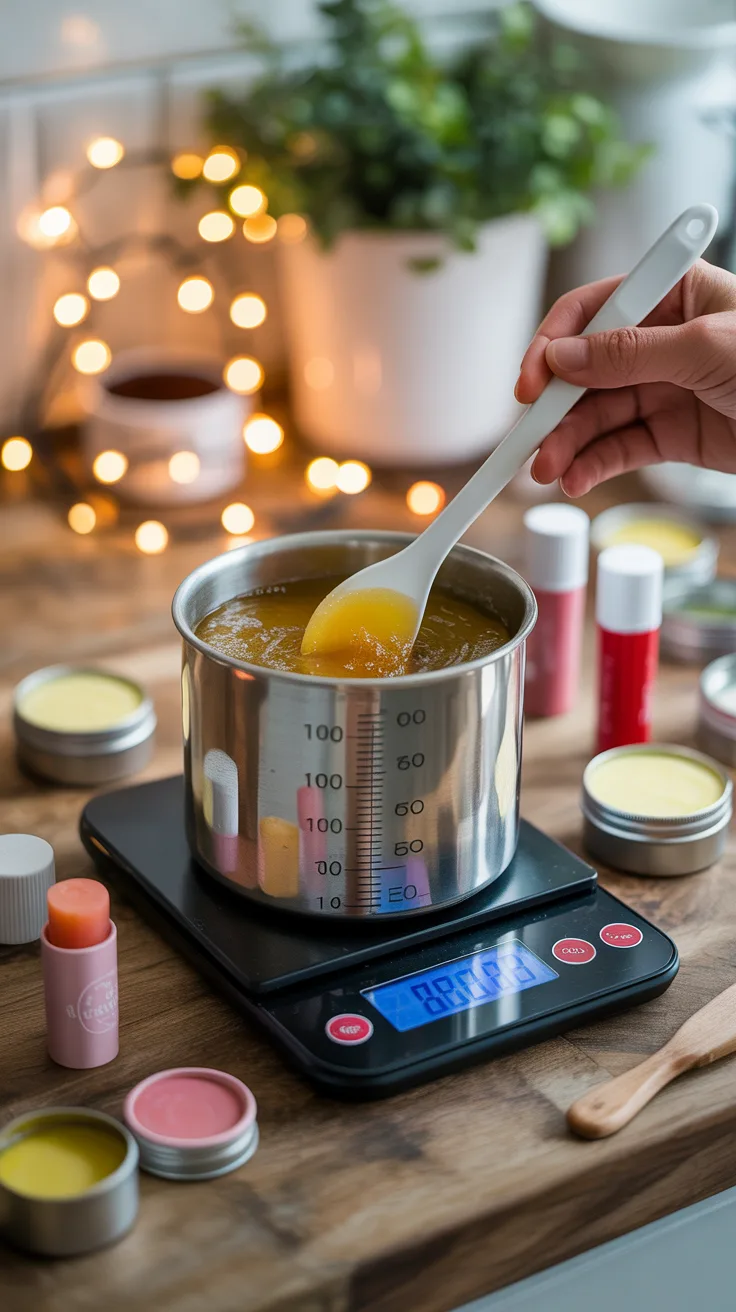
My first attempt at making lip balm involved a makeshift double boiler that nearly ended in disaster. Save yourself the trouble and gather these essential tools before starting:
- Double Boiler – Essential for melting wax and oils without burning. If you don’t have one, a heat-safe glass bowl over a pot of simmering water works perfectly.
- Digital Kitchen Scale – For precise measurements. I’ve found that measuring by weight rather than volume produces more consistent results.
- Measuring Spoons – For smaller quantities of ingredients.
- Heat-resistant Silicone Spatula – For stirring the mixture without scratching your containers.
- Droppers – For adding essential oils precisely.
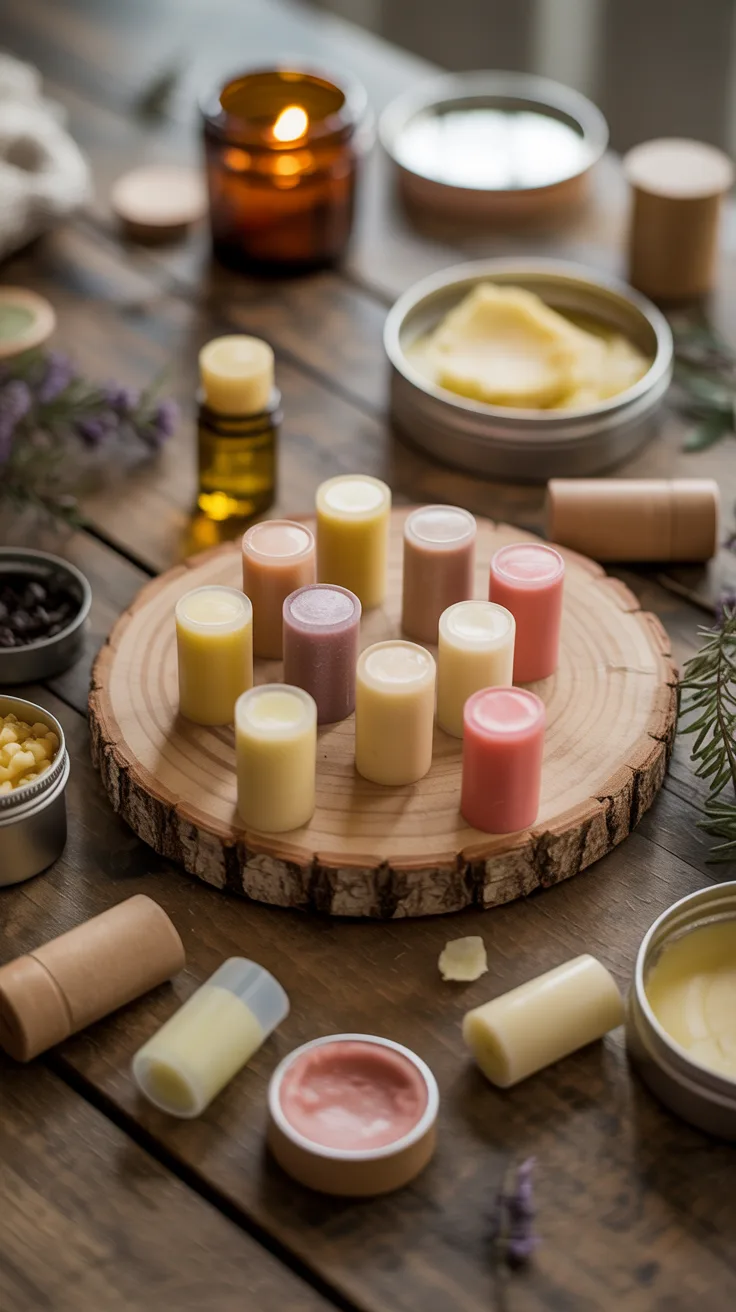
- Lip Balm Containers – Tubes, tins, or small jars. I prefer tubes for convenience, but tins look more gift-worthy.
- Small Funnel or Transfer Pipettes – Trust me, trying to pour melted lip balm directly into tiny tubes is a messy disaster waiting to happen!
- Labels and Decorative Materials – For personalizing your gifts.
Pro Tip: Set up a dedicated “filling station” with containers arranged and ready before melting your ingredients. Once the mixture is ready, you’ll need to work quickly before it starts to solidify.
12 Creative DIY Lip Balm Recipes
After years of experimentation, these are my 12 favorite lip balm recipes that have received the most compliments from recipients:
- Mint Chocolate – Combine cocoa butter, coconut oil, beeswax, and peppermint essential oil for a refreshing, dessert-like balm.
- Lavender Vanilla – Mix shea butter, almond oil, beeswax, lavender essential oil, and a drop of vanilla extract for a calming, sweet blend.
- Citrus Burst – Blend coconut oil, beeswax, sweet orange, lemon, and grapefruit essential oils for an energizing aroma.
- Honey Almond – Combine sweet almond oil, beeswax, a touch of real honey, and almond extract for a nutty, sweet feel.
- Rose Petal – Infuse jojoba oil with dried rose petals, then combine with beeswax and a drop of rose essential oil for a romantic, floral balm.
- Chai Spice – Mix coconut oil, beeswax, and a blend of cinnamon, cardamom, and clove essential oils for a warm, spicy vibe.
- Peppermint Candy – Combine coconut oil, beeswax, peppermint essential oil, and a touch of stevia for a sweet, cooling treat.
- Berry Bliss – Blend shea butter, coconut oil, beeswax, and berry-flavored oil with a touch of beetroot powder for color.
- Cocoa Butter Delight – Use extra cocoa butter with coconut oil and beeswax for a rich, chocolatey balm that needs no additional scent.
- Green Tea Matcha – Combine coconut oil, shea butter, beeswax, and a teaspoon of matcha powder for an antioxidant-rich balm.
- Lemonade Twist – Mix coconut oil, beeswax, lemon essential oil, and a touch of stevia for a refreshing, summer-inspired balm.
- Vanilla Bean – Infuse jojoba oil with real vanilla bean, then combine with shea butter and beeswax for a classic, universally-loved scent.
Pro Tip: For kid-friendly options, I stick with food-grade flavoring oils instead of essential oils, as some essential oils can be too potent for children. My nieces go crazy for the Berry Bliss recipe!
Packaging Ideas for Your Lip Balm Gifts
I’ve learned that presentation can elevate a simple lip balm into a gift that draws gasps of delight. Here are my favorite packaging ideas:
- Custom Labels – Design personalized labels with the recipient’s name, the flavor, and even a cute message. I use printable label paper and a simple design program.
- Gift Sets – Group 3-4 complementary flavors in a small box lined with tissue paper or nestled in a decorative tin.
- Organza Bags – Place a tube or tin in a small organza bag with a ribbon—simple but elegant.
- Mason Jar Gift – Fill a small mason jar with shredded paper, then nestle several lip balms inside with a handwritten note.
- Upcycled Containers – Use vintage mint tins, small jewelry boxes, or repurposed containers for an eco-friendly touch.
- Lip Balm Bouquet – Attach lip balm tubes to wooden skewers and arrange them in a small vase like flowers—this was a huge hit at my friend’s bridal shower!
- Seasonal Packaging – Wrap in themed paper for holidays, or attach to a card shaped like a snowflake, flower, or other seasonal motif.
- Gift Card Pairing – Attach a lip balm to a small gift card for a coffee shop or bookstore for a thoughtful “me time” package.
Pro Tip: I keep a “gift packaging station” in my craft area with various ribbons, small boxes, tissue paper, and decorative elements. This makes assembling gifts quick and easy when I’m in a rush.
Tips for Personalizing Your Lip Balm Gifts
The most memorable gifts I’ve given have been those tailored specifically to the recipient. Here’s how I personalize my lip balm gifts:
Consider the recipient’s preferences and needs. My mom loves roses, so I make her rose-scented balms. My brother works outdoors, so I create extra-protective formulations with more beeswax. For my friend who loves makeup, I add a hint of mica for shimmer.
Create themed collections based on interests. For my tea-loving aunt, I made a set of tea-inspired balms (Earl Grey, Chai, and Green Tea). For my beach-obsessed cousin, I created tropical flavors with names like “Ocean Breeze” and “Sunset Coconut.”
Add a personal touch to the packaging. Include a note explaining why you chose specific ingredients or scents. One year, I wrote tiny “origin stories” for each flavor, explaining the inspiration behind them.
Consider seasonal needs. In winter, I make more deeply moisturizing formulations. In summer, I include SPF ingredients (zinc oxide) and refreshing scents.
Don’t forget about allergies and sensitivities. I always check with recipients about potential allergies. My sister-in-law is allergic to almonds, so I avoid almond oil in her balms and clearly label all ingredients.
Pro Tip: Keep a small notebook recording which recipes you’ve given to whom and their reactions. This helps you refine your gifts each year and remember which flavors were hits with specific people.
Frequently Asked Questions
How long does homemade lip balm last?
With proper storage in a cool, dry place, homemade lip balm typically lasts 6-12 months. Adding vitamin E oil as a natural preservative helps extend shelf life. I’ve found that balms with essential oils tend to maintain their scent for about 6 months before fading.
Can I use essential oils in my lip balm?
Yes, but use them sparingly and ensure they’re safe for topical use, especially on sensitive lip tissue. I recommend 3-5 drops per 1 oz of base ingredients. Some oils like cinnamon, peppermint, and citrus can cause sensitivity in some people, so use these in even smaller amounts (1-2 drops).
What are the benefits of using natural ingredients in lip balm?
Natural ingredients are gentler on sensitive lip tissue and free from potentially harmful chemicals found in commercial products. They’re also environmentally friendly and often provide additional benefits—shea butter offers deep hydration, beeswax creates a protective barrier, and essential oils can provide aromatherapy benefits.
How can I make my lip balm more moisturizing?
To increase moisturizing properties, adjust your recipe to include more butters and oils relative to beeswax. Adding ingredients like honey (a natural humectant), vitamin E oil, or a drop of jojoba oil can significantly boost hydration. For extremely dry lips, I sometimes add a small amount of lanolin, which works wonders.
Is it safe to add color to homemade lip balm?
Yes, but stick to natural or cosmetic-grade colorants. I use beetroot powder for pink/red tints, cocoa powder for brown, turmeric for yellow (use very sparingly!), or cosmetic-grade mica powders. Avoid craft glitters or food coloring, which aren’t designed for lip application. Always test colored balms on your arm before applying to lips to check for sensitivity.